
I wanted to review in greater detail how to make your data dynamic for use in charts and dashboards.
In the below sample data I have some basic information that I would like to make dynamic for use in a graph. To accomplish this I will place my dynamic data in columns H – L and use Checkboxes that the user can either check or uncheck to select the data they want to see.

To stat I want to add a checkbox from the form Controls. You can select the Developer Tab >Insert > then Check Box

I then drag the curser while holding down the left mouse button to create my checkbox in the worksheet.

I right mouse click on the newly added checkbox and select Edit Text and rename it to read “Customers”. As it stands now, there is no association to the sales column and the check box with the name customers. That association will be created using an =IF formula later.
Next I right mouse click on the added checkbox and select Format Control. Here is where I want to assign the value of the check box to a specific cell. In this case I select cell I3.

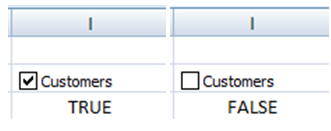
Now when the box is checked, cell I3 displays “True”. If it’s not checked, it displays “False”. Here I display the same Customers checkbox in both the True and False state.
Next I repeat the above process for the other columns, Customers, Returns and Total Profit making sure that I update the Cell Link for each column.

Now I can create an association to the columns of data and the checkboxes by using a simple =IF formulas to return my data when the checkbox target cell = “True”.
Cell I5 formula =IF(I$3,C5,NA())
Cell J5 formula =IF(J$3,D5,NA())
Cell K5 formula =IF(K$3,E5,NA())
Cell L5 formula =IF(L$3,F5,NA())
I copy this formula down my column for each row that has data (H5 – L16).

When done my columns will display the appropriate value when a box is checked and the text “#N/A” when the box is unchecked. Well right about now your thinking that this looks terrible, and you would be correct. However this is just a demonstration. In a real dashboard design I would have the dynamic data on a different tab where people cannot see it and the checkboxes would be at the top of the dashboard. The chart that gets created from the dynamic data would show on the dashboard.
Now let’s examine a simple graph using the above logic.
I create a basic line chart. When each checkbox for the data in my line chart is checked, my data is represented.

If I uncheck Customers and Total Profit the chart changes and you will notice that only Sales and Returns are represented in the chart.
So how does the graph know to remove the columns of data. Well it goes back to the =IF(I$3,C5,NA()) formula. If I had written the formula as =IF(I$3,C5,0), then when the checkbox was unchecked, a 0 would populate in the cell instead of a #N/A. That would cause my graph to still show the column of data but it would flat line at the bottom since the value would be 0. In the next example I have changed the formula for total profit to return a zero when the checkbox is not checked. You can see on the graph that total profits shows at the bottom of the graph as 0. Compare this to the customers column which is not displayed (since I still used the =IF(I$3,C5,NA()) formula in that column.

By default, data that is hidden in rows and columns in the worksheet is not displayed in a chart, and empty cells are displayed as gaps (remember our cells are not empty). For most chart types, you can display the hidden data in a chart.
However I prefer returning the #N/A. Now of course I can continue to clean up my chart, placing the customer value on a secondary axis, and add other features to clean it up. Notice that I moved the checkboxes and made the dynamic data font white to match the background. I then moved the final graph over the dynamic data.

So how can you apply the above techniques in your dashboards and charts to transform your data from the ordinary to the extraordinary?
No comments:
Post a Comment