Two Ways To Fill In Blank Cells

There are times that we have blank cells within our data. Quite often I will fill in these blanks with either TBD or NA.
Color
Count
Red
5
Blue

Green
6
Orange

Brown
8
Yellow
4


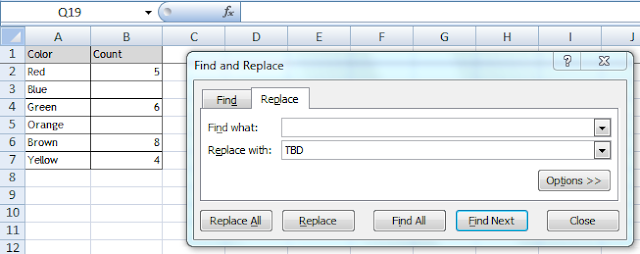
Now I could do a Find / Replace by pressing CTRL+H to bring up the Find and Replace box.
I leave the Find what box blank and enter TBD in the Replace with selection. I then just click Replace All and Excel updates my data.
Color
Count
Red
5
Blue
TBD
Green
6
Orange
TBD
Brown
8
Yellow
4


Simple, straight forward, easy. I like it.
However you can get the same result with the Go To command (F5).
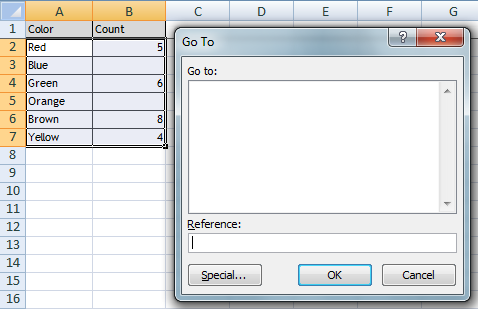
Start by selecting all the cells that you want to find the blanks. (In my example this is cell range A2 to B7). Next press F5 to bring up the Go To dialog box.


Click on the special button and then choose Blanks. Next click the OK button.

Excel will position the curser on the first blank cell but will also highlight all the blank cells in your range. Type TBD and then press CTRL+Enter.
Excel populates all the blank cells with TBD.
Change the user name

In a previous job of mine I was tasked with a simple problem. Identify who was opening non shared spreadsheets on a network drive (and keeping them open for hours at a time). When you tried to open the spreadsheet, you would get the message that the spreadsheet was already open.

To add to my enjoyment, the user thought it would be funny to put “Joe Cool” in the user name box for his Excel product so the message read that the spreadsheet was already open by Joe Cool.

Now there were a few hundred users in the company and tracking down this individual was a pain in the #$#@!.

I eventually identified the user and he got the greatest laugh at the thought of this scenario. However from my side, it was 10 hours of work / wasted time to track him down. His manager did not laugh so much when I charged my time to this team’s departmental budget.

So what can we take away from this? Be kind to your co-workers and make sure that you update the username.

Click on the Windows button at the top left corner of Excel and then select the Options at the bottom of the window, then select the Popular tab. Change the User Name and then click the OK button.